Building an Interactive Chatbot with OpenAI’s API and Node.js
This tutorial demonstrates how to build a simple chatbot in Node.js that continuously interacts with OpenAI’s assistant until the user chooses to exit. The code leverages OpenAI’s API to enable seamless communication with a pre-configured assistant using an Assistant ID and API key stored securely in an environment file.
Here’s a step-by-step breakdown of the code and how it works.
Prerequisites
To get started, ensure the following are installed:
– Node.js: Install the latest stable version from nodejs.org.
– NPM (Node Package Manager): Included with Node.js.
– OpenAI API Key and Assistant ID: Create an assistant in the OpenAI platform and obtain the API key and Assistant ID from the dashboard.
Environment Setup
To keep sensitive information secure, the code utilizes a .env file for storing credentials. This file should contain:
ASSISTANT_ID=your-assistant-id
API_KEY=your-api-key
Install the dotenv, axios and openai package to load these values into the Node.js environment:
npm install dotenv
npm install openai
npm install axios
Key Components of the Code
1.) OpenAI API Configuration
The OpenAI package is initialized with the API key to handle API interactions:
const OpenAI = require('openai');
require('dotenv').config();
const openai = new OpenAI({ apiKey: process.env.API_KEY });
2.) Retrieving the Assistant
The assistant’s details are fetched using its unique ID. This ensures the correct assistant is identified.
async function retrieveAssistant() {
    const response = await axios.get(`https://api.openai.com/v1/assistants/${process.env.ASSISTANT_ID}`, {
        headers: {
            'Content-Type': 'application/json',
            'Authorization': `Bearer ${process.env.API_KEY}`,
            'OpenAI-Beta': 'assistants=v2'
        }
    });
    return response.data;
}
3.) Managing Chat Threads
A new chat thread is created to start a conversation with the assistant. User messages are sent to this thread, and the assistant’s response is retrieved:
async function createThread() {
    return openai.beta.threads.create();
}

async function addMessageToThread(threadId, messageContent) {
    await openai.beta.threads.messages.create(threadId, {
        role: 'user',
        content: messageContent
    });
}
4.) Generating and Fetching Responses
The assistant processes the thread using the createAndPollRun method. This waits for the assistant’s response and retrieves it once the processing is complete:
async function createAndPollRun(threadId, assistantId) {
    return openai.beta.threads.runs.createAndPoll(threadId, {
        assistant_id: assistantId
    });
}

async function getAssistantResponse(threadId) {
    const messages = await openai.beta.threads.messages.list(threadId);
    const responseMessage = messages.data.find(message => message.role === 'assistant');
    return responseMessage.content[0].text.value;
}
5.) Removing Source References
The assistant’s response might contain references to sources. A regular expression removes these for cleaner output:
async function removeSourceReferences(inputString) {
    const sourceReferencePattern = /【\d+:\d+†source】/g;
    return inputString.replace(sourceReferencePattern, '');
}
6.) Interactive Chat Loop
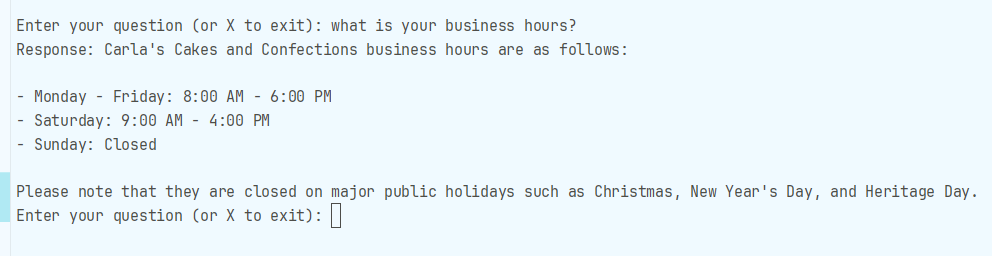
An interactive loop enables the user to continuously ask questions until they decide to exit by pressing “X”:
const readline = require('readline').createInterface({
    input: process.stdin,
    output: process.stdout
});
const askQuestion = () => {
    readline.question('Enter your question (or X to exit): ', async (input) => {
        if (input.toUpperCase() === 'X') {
            readline.close();
        } else {
            const response = await getChatGPTResponse(input);
            console.log('Response:', response);
            askQuestion();
        }
    });
};

askQuestion();
How It All Works Together
When the program starts, it initializes the OpenAI API using the stored credentials.
The askQuestion function prompts the user for input.
Each user input is processed by sending the question to the assistant through a thread.
The assistant generates a response, which is cleaned of unnecessary references before being displayed.
The loop continues until the user types “X” to exit.
Running the Program
Save the code in a file, e.g., openAI.js.
Run the program using: node openAI.js
Interact with the assistant by typing questions and pressing Enter. Exit by typing “X.”
Key Features and Benefits
– Reusability: The code is assistant-agnostic, meaning it can work with any assistant on the OpenAI platform by simply updating the Assistant ID.
– Security: Sensitive credentials are securely stored in the .env file.
This program is a simple yet powerful way to leverage OpenAI’s capabilities for creating conversational AI applications. With minimal modifications, it can be adapted to various use cases, from customer support bots to personal assistants.
Here is the complete code
const OpenAI = require('openai')
const axios = require('axios')
require('dotenv').config()

const ASSISTANT_ID = process.env.ASSISTANT_ID
const API_KEY = process.env.API_KEY

let openai = new OpenAI({ apiKey: API_KEY })

/**
* Handles the whole process of getting a response from ChatGPT based on what the user asks.
* This is the main function that ties everything together.
*/
const getChatGPTResponse = async (requestMessage) => {
   try {
       const assistant = await retrieveAssistant()
       const thread = await createThread()
       await addMessageToThread(thread.id, requestMessage)
       const run = await createAndPollRun(thread.id, assistant.id)


       if (run.status === 'completed') {
           let responseMessage = await getAssistantResponse(run.thread_id)
           responseMessage = await removeSourceReferences(responseMessage)
           return responseMessage
       }


       return 'Run did not complete successfully.'
   } catch (error) {
       console.error('Error:', error)
       throw error
   }
}


/**
* Gets the assistant's info from OpenAI's API.
* Needed to know which assistant you're talking to.
*/
async function retrieveAssistant() {
   try {
       const response = await axios.get(`https://api.openai.com/v1/assistants/${ASSISTANT_ID}`, {
           headers: {
               'Content-Type': 'application/json',
               'Authorization': `Bearer ${API_KEY}`,
               'OpenAI-Beta': 'assistants=v2'
           }
       })


       const data = response.data
       // console.log(data)
       return data
   } catch (error) {
       console.error('Error retrieving assistant:', error.response ? error.response.data : error.message)
       throw new Error('Error retrieving assistant')
   }
}


/**
* Starts a new chat thread with the assistant.
* Think of it as opening a new chat window.
*/
async function createThread() {
   return openai.beta.threads.create()
}


/**
* Sends the user's message to the chat thread.
* This is how you actually ask the assistant a question.
*/
async function addMessageToThread(threadId, messageContent) {
   await openai.beta.threads.messages.create(
       threadId,
       {
           role: 'user',
           content: messageContent
       }
   )
}


/**
* Tells the assistant to start thinking and gets the response when it's done.
* Basically, this is where the magic happens.
*/
async function createAndPollRun(threadId, assistantId) {
   return await openai.beta.threads.runs.createAndPoll(
       threadId,
       {
           assistant_id: assistantId
       }
   )
}


/**
* Grabs the assistant's reply from the chat thread.
* This is what you'll show to the user.
*/
async function getAssistantResponse(threadId) {
   const messages = await openai.beta.threads.messages.list(threadId)
   const responseMessage = messages.data.find(
       message => message.role === 'assistant'
   )
   return responseMessage.content[0].text.value
}


/**
* Removes any source references from the response.
* Just cleans things up a bit so it's easier to read.
*/
async function removeSourceReferences(inputString) {
   const sourceReferencePattern = /【\d+:\d+†source】/g
   return inputString.replace(sourceReferencePattern, '')
}


// Interactive Loop


/**
* Keeps asking the user for input and shows the assistant's response.
* Runs until the user decides to exit.
*/
const readline = require('readline').createInterface({
   input: process.stdin,
   output: process.stdout
})


const askQuestion = () => {
   readline.question('Enter your question (or X to exit): ', async (input) => {
       if (input.toUpperCase() === 'X') {
           readline.close()
       } else {
           const response = await getChatGPTResponse(input)
           console.log('Response:', response)
           askQuestion() // Keep going until the user exits
       }
   })
}


askQuestion()

WRITTEN BY
Carla Pretorius