
Content Creation Setups
Make it fun and creative
Introduction
First let’s start with addressing a few misconceptions that are running through the internet today.
Built in microphones are equal to dedicated microphones. - Although built-in microphones on devices such as laptops and mobile phones have gone very far in both quality and clarity. They still lack both pick-up range and noise level control.
Dedicated audio tech is expensive.- We all have been on those high end audio factory websites such as Rode or Bothners Musical Instruments where their entry level kits cost anything from R 7,000 - R 25,000 but it doesn’t need to be.
Where to start
The first step is thinking about what you want to do. Are you going to record tutorials, podcasts, walk throughs, virtual meetings, etc. For our example we are gonna talk about 2 possibilities both Podcast and tutorial.
Podcast
1. Camera
2. Hdmi capture card
3. Microphone
4. Audio Interface
5. Headphones
6. OBS Studio
Tutorial
1. Camera (optional)
2. Microphone
3. Interface
4. Headphones
5. OBS Studio
Now for both the setup is almost the same with the only difference being how we will be using the technology.
Camera
When it comes to camera choice it solely depends on usage. If you are looking at doing a multi person podcast a dedicated DSLR or Camcorder would be the best choice connected via a hdmi capture card and you have quality assured. But what do you do when you can't afford a R 26 000 camera and a R 3 000 capture card. Well then the best alternative would be a decent Webcam and keeping in mind the following specifications.
1.Resolution - in reference to the megapixel count as well as the output resolution, (the higher the better)
2.Frames per second - a good starting point is 30 fps to 60 fps
3.Aperture - Most webcam’s have a aperture of about 1.2f to 1.8f, (higher is better) idea would be 2.2f+
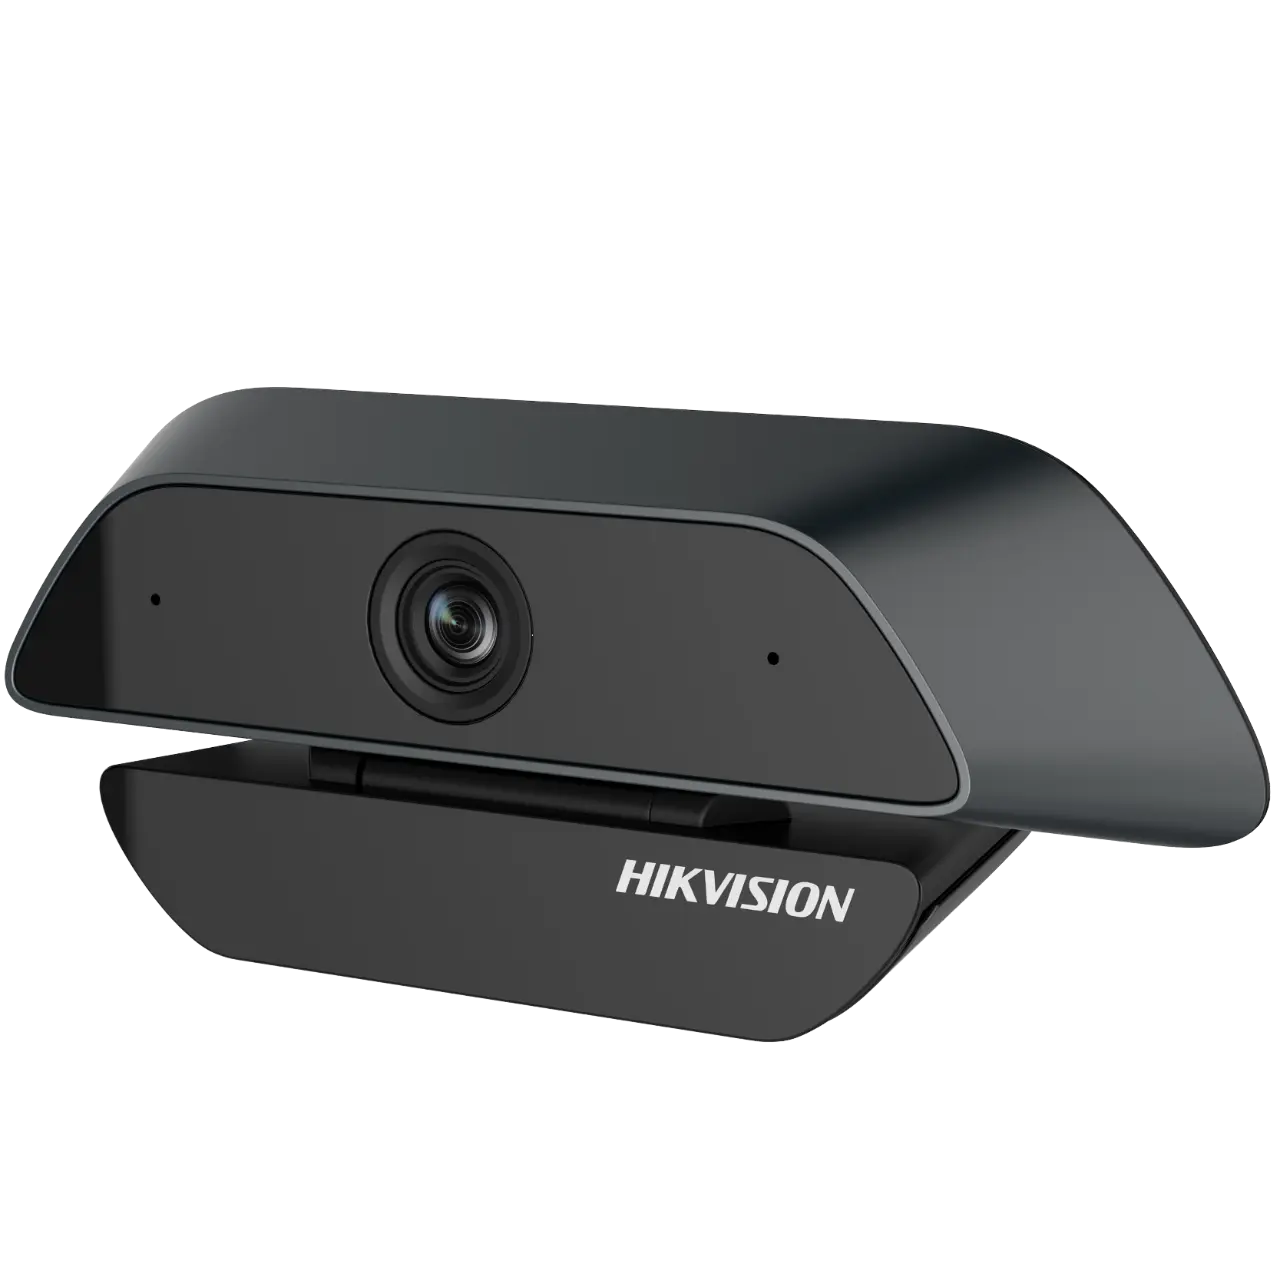
My Recommendation is the HikVision DS-U12 for both budget and quality.
Microphone
When selecting a microphone there are a few things to keep in mind.
1.The pick up pattern needed for your production.
2.Whether you will be using a XLR microphone or USB microphone.
3.The amount of ambient noise.
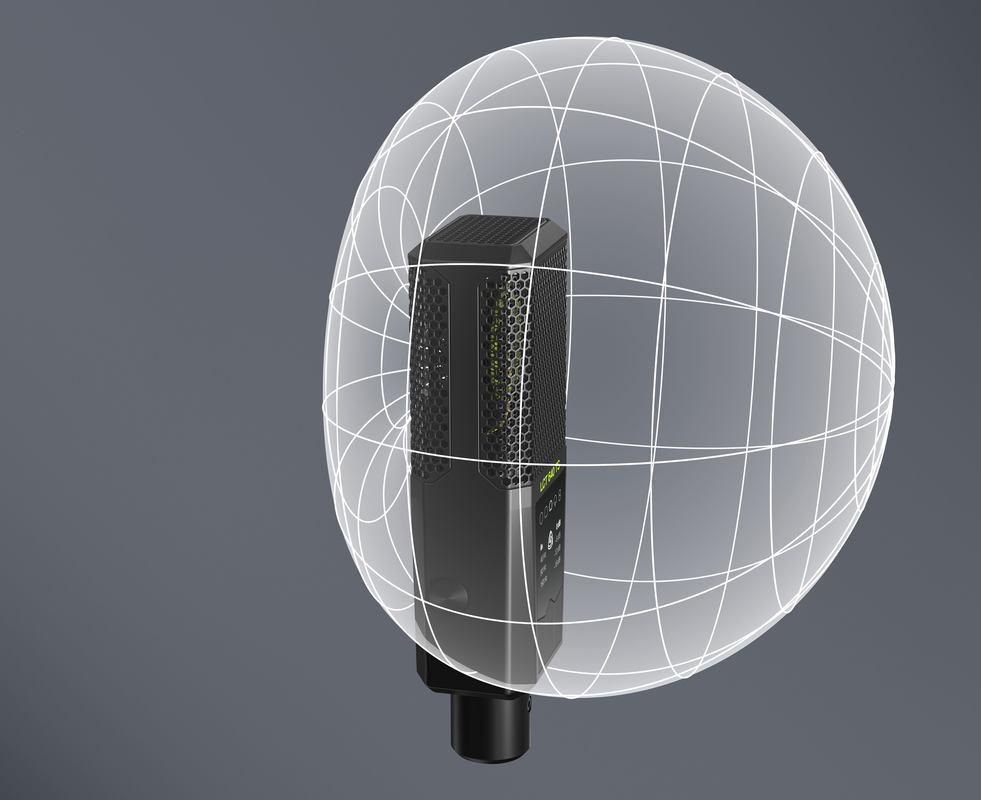
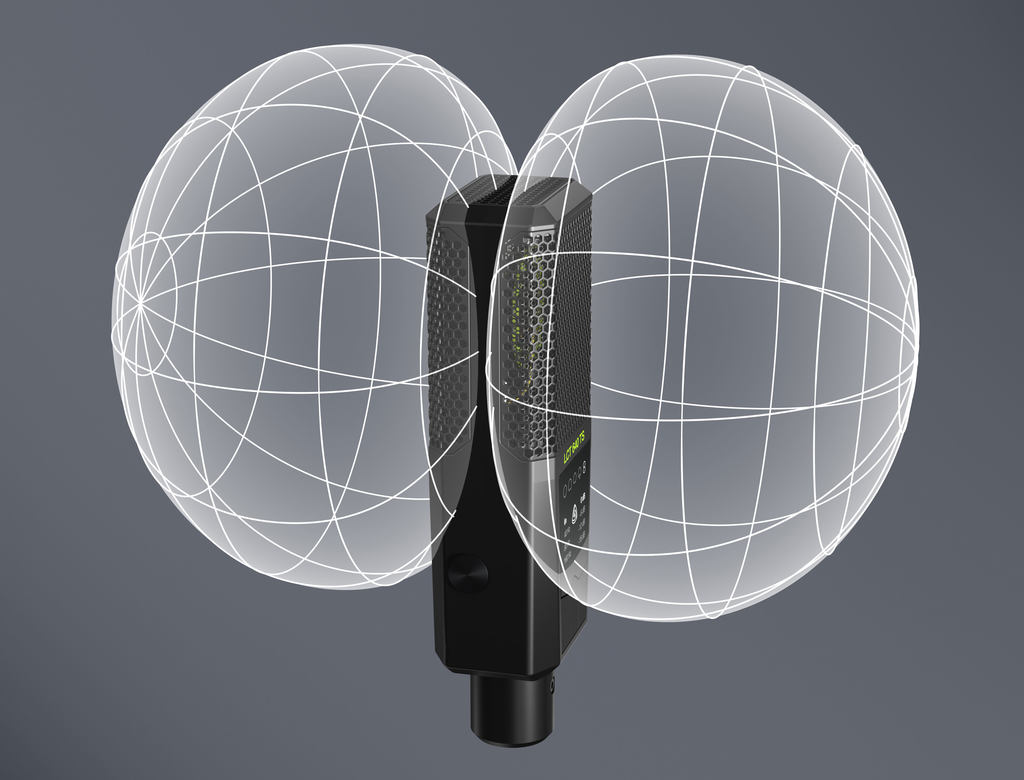
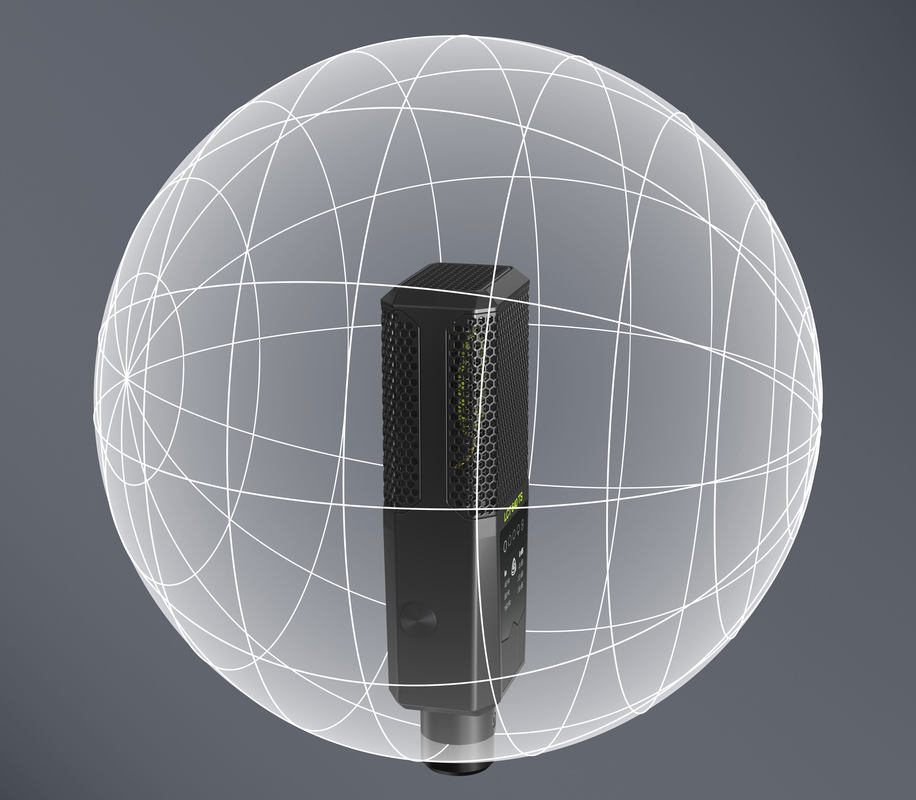
Pick up patterns
There are 3 different types of pick up patterns
Cardroid
This is the most common and easy to use pick up pattern also known as a forward facing pick up pattern. Meaning the Microphone diaphragm is geared to pick up sound only from 1 direction and tune out sound from the other.
Bi-Directional (Figure 8)
This pick up pattern is best for an easy budget based multi person podcast as it picks up audio from both front and back. Emulating a figure 8 style pickup pattern.
Omni-Directional
This pattern is the hardest to use and yet the easiest to understand. As it has no noise cancellation and picks up everything in a full 360 degree pattern.
XLR or USB
This is important as it could very well dictate your budget and your future upgradability as XLR means you have to get an audio interface but have an upgradeable path. Where USB is cheap to enter but has a lot of negatives. So let's discuss the Pro’s and Con’s of both.
XLR
Pro
Better Quality
Can connect almost an Infinite amount of Microphones.
Easy to tune and equalize
Con
Expensive
Harder to get introduced to and setup
USB
Pro
Decent Quality
Cheap
Con
No real upgrade path
Limited to the amount Microphones by the amount of USB ports your computer can manage
Needs complex software to tune and equalize.
One thing to note is that either way there will be a form of USB input for both our examples. Via a built-in USB interface or an external one. A few notes to keep in mind when dealing with Microphones.
1. Every microphone works with what's called a diaphragm and it is very fragile and can be easily damaged or torn. The best way to avoid it is by keeping the microphone a distance of at least 20 - 30 cm away from the speaker. Also avoid tapping or slamming on the microphone at all costs.
2. What works for 1 doesn't work for the other. Every person has a different tone and registry they speak in. Some might have a high pitched voice others a lower pitched voice. The microphone needs to be set up everytime according to each person’s tone. The best advice to keep is to remember the following. Deep voices travel farther but are commonly softer and high pitch voices travel a shorter distance but tend to be louder. The best listening experience is in the middle ground.
3. Try to not handle the microphone while actively using it. Most recording microphones can pick up the sound of you touching and moving the microphone around.
Headphones
This is a must and very often overlooked part of audio setups and makes the difference between Good and Bad Audio quality. The quality of the headphones is not important per-say but rather how you use them.
Audio Feedback
Now this is a 2 pronged word in an Audio setup. The first would be the feedback of what your content consumers are hearing from you and listening to that feedback or monitoring it is very important as it could lead to alleviating bad habits such as leaning away from the microphone or even getting too close. The second is the avoidance of feedback and echo’s created when not using headphones, meaning your computer audio. The best example of this would be that you are recording the audio from your computer using recording software and using a microphone. The computer would then play a sound that would get recorded by your recording software and then picked up by your microphone a half a second later due to the time it takes sound to travel causing an echo or after echo.

Habbit Control
Humans are creatures of habit and we tend to move our bodies and manipulate our voices based on what our surroundings or interactions may be. This is all too common when in for say a Podcast and you are engaged in a heated discussion. It is very easy to lean back and forget your microphone or even lean too far in and cause peaking problems that make the audio distorted. Monitoring your microphone via headphones gives you an opportunity to fix those habits and ensure a proper listening experience to all your content consumers.
In general it is best to use headphones for any sort of content creation and works best applied as a self improvement tool.
OBS Studio
Now we get to the fun part putting all your sound together and actually creating visible content.
Although we are only talking about OBS Studio in this post there are plenty of recording software alternatives out there that could more than do the job for you and I do encourage you to explore the alternatives.
The reason I decided on OBS Studio is because it has over the years earned its name in the content creation industry for both being completely Free-Open-Source-Software, hyper flexible and pretty easy to get started on.
With OBS you get a few tools that will Automatically make your life easier.
The Scene collection tool. You can create endless amounts of screen and setups that your viewers will see complete with custom graphics and layouts that can be switched between via a click of a button.
The audio mixer. The Audio mixer allows you to add and control any audio that you might interact with via your source channel that is part of the scene and is dedicated per scene. For instance a Audio capture device being your Dedicated Audio device or a Video capture device if you for instance opted to only use a webcam with a built in audio source. This channel also allows you to add what is called filters/effects. Here we can get into some tools that might help with making your life easier. Such as : noise suppression, graphical equalizer and gate. Now keep in mind a simple rule: any filter that removes excessive noise always comes first so for instance with these filters the best route of use would be Gate, Noise suppression, Graphical equalizer. This channel also allows you to set up your monitoring of your audio device that we spoke of during our headphones segment.
The variety of output channels. OBS supplies you with 3 output channels namely, Record, Live stream and Virtual Web Camera. Keep in mind that only 2 of those actually can capture and use your audio setup, the other would rely on whatever 3rd party software you are using to receive your content. (meets, teams or zoom).

The Wrap
So in conclusion you will have to do a bit of research to see what best fits your needs and I hope that this guide will help you in meeting your goals and guide you towards better audio and video decisions for your content.
A little side note. Don’t think about your setup too much and expect everything to work perfectly first shot. Experiment with your setup and play around. Look what other creators and Pro’s are doing with their setups. Sometimes the best solution is the easy one, other times the best solution is the one that is the most fun to use. It is all up to you and what you deem to be entertaining.
